Course editor: Overview
Where: Courses → click a course → “Overview” tab
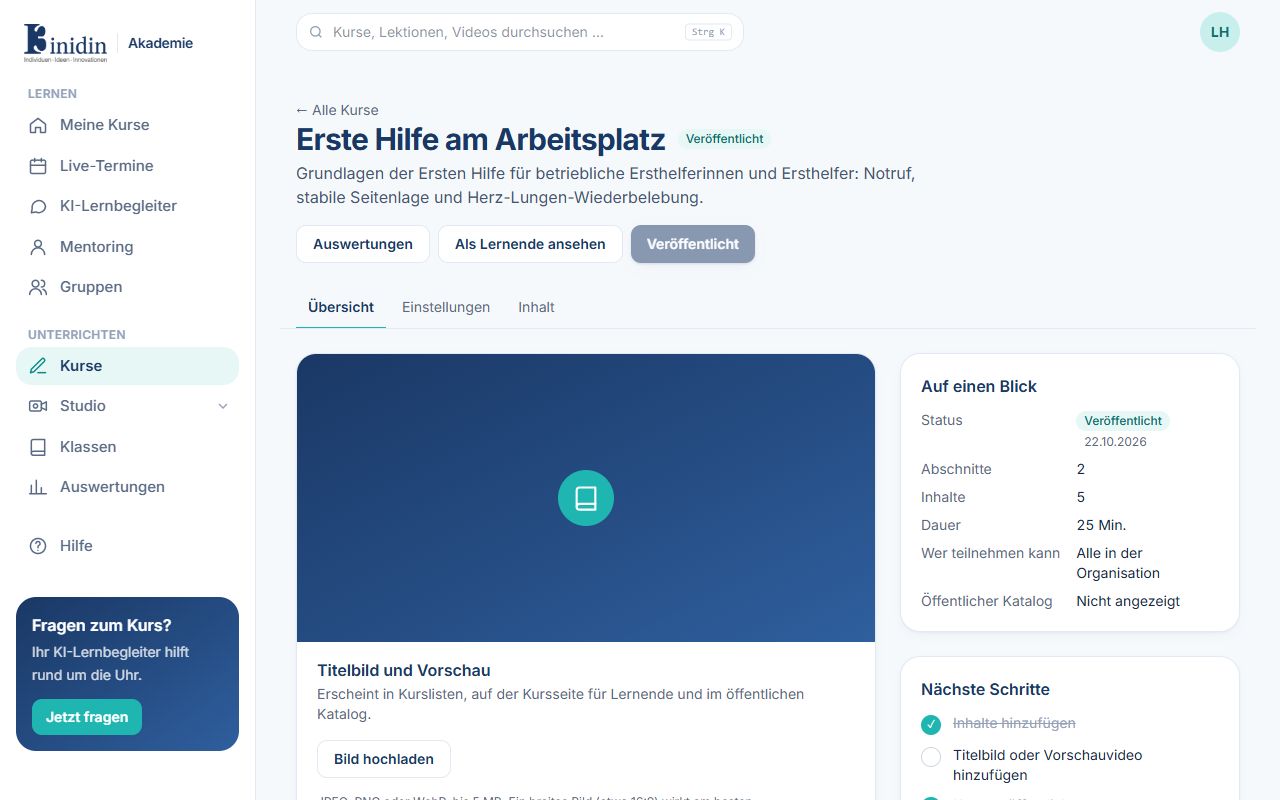
The overview shows where the course stands and the next steps to publishing.
Fields and buttons
Section titled “Fields and buttons”- Cover image and preview: A picture (JPEG, PNG or WebP, up to 5 MB, ideally 16:9) for course lists and the catalog. A video from the course can be the preview.
- Find a free photo: Searches Pexels or Pixabay (if connected). Clicking a photo downloads it as the cover; the photographer is credited below it.
- Make one with AI: Describe what the picture should show; FLUX or OpenAI makes a realistic photo without text. You see a preview first and take it with “Use as cover” or make another. It’s marked as AI-generated.
- At a glance: Status, sections, items, length, who can take part and whether it’s in the public catalog.
- Next steps: Checklist: add content, cover image, publish, optionally offer it in the catalog.
- Try as a learner / See it as a learner: Opens the course as learners see it, also before it’s published. Work through it, answer quizzes and ask the AI companion. A yellow notice shows you’re in the preview; “Start over” removes your own test progress, “Back to the editor” returns.
- Insights: Jumps to this course’s insights.
- Publish: Makes the course visible to everyone with access.